Nowadays there are so many ways to add value and improve your home.
One of the greatest ways is, of course, do it yourself and construct your own decking area…

The first stage of the construction is to re-arrange or set up the area where you are going to place your wooden deck.
And now time for me to trace a line on the plank to have the right measurement to make the cut.

For this cut, I will be using my miter saw, but in case you don’t one you could also use a circular saw, jigsaw or even your handsaw.

Then it’s now time to trace and cut all the joist to the required length…
As you can see, I have decided to wait after making all the cut in order to place the last garden brick and this was only in case of adjustment for the wooden planks.
And if you don’t have the appropriate saw, I will be here showing you a pretty simple way the cut a brick on a specific measurement.
Alright… So Now time to place it back!
Before placing the different joist I am here making the ground as flat as possible in order to add the plastic protection mat on top of it
Then time to place the different Joist in place

And start covering them with the planks
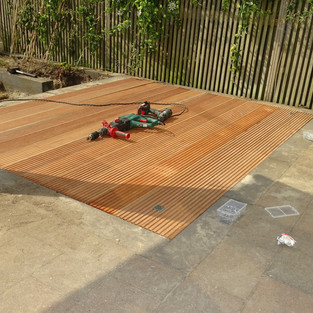
And here we are with a new upgraded wooden deck...
If you have been making this project at home, feel free to share with us or comment below this article.
As preview find Below our short DIY Video:
Mr ATC for another idea of housing
Would you like to support ATC for more sustainable consumption patterns? Take part of the 1 reservation = 1 tree planted program, book here and share:
Did you like this article? Register now and for free to be informed of new and up-to-date news articles.


