You've got to start with photos of the finished project right? Well, this is it!
This project was a lot of fun, but incredibly stressful at times. There were a lot of firsts for me and it challenged me in ways I wasn't expecting. Want to see how I made it? Scroll on down the page, I've got detailed instructions on how I built it as well as a bunch more finished photos.
OH WAIT, before you do that though, do me a favor and check out my Instagram page (even follow me if that's something you're into :) ) at https://www.instagram.com/zacharyms/. I post frequently with new projects and DIY tips. If you like my work, Instagram is the platform where I'm the most active and put out the most content.
Ok now that I've got my social media plug out of the way, let the scrolls commence!

Like I said before there were quite a few stressful moments with this build, but I've got to say I got a lot of positive feedback along the way from people on Instagram (I usually post progress pics to my stories) and it really helped keep me motivated.
Similarly, I get a lot of feedback from people on Imgur and Reddit when I post projects and I really appreciate anyone who takes the time comment and asks questions. It keeps this process interesting for me. So I'd to give a big thank you to anyone who has commented, or even just upvoted, one of my posts in the past and a big thank you in advance to anyone who upvotes or comments on this project :)

Do you love herringbone patterns? Because I know I do!
I've been obsessed with it ever since I saw a tile floor done in a herringbone pattern a couple of years ago. I've been trying to find the right project to use a herringbone pattern on for a little while now. I actually had a false start a few months back where I started doing a coffee table with a herringbone pattern but abandoned the project because I didn't like how it was turning out.
Not all of my projects end up working out, unfortunately. Sometimes it's best to just abandon a project you aren't passionate about.
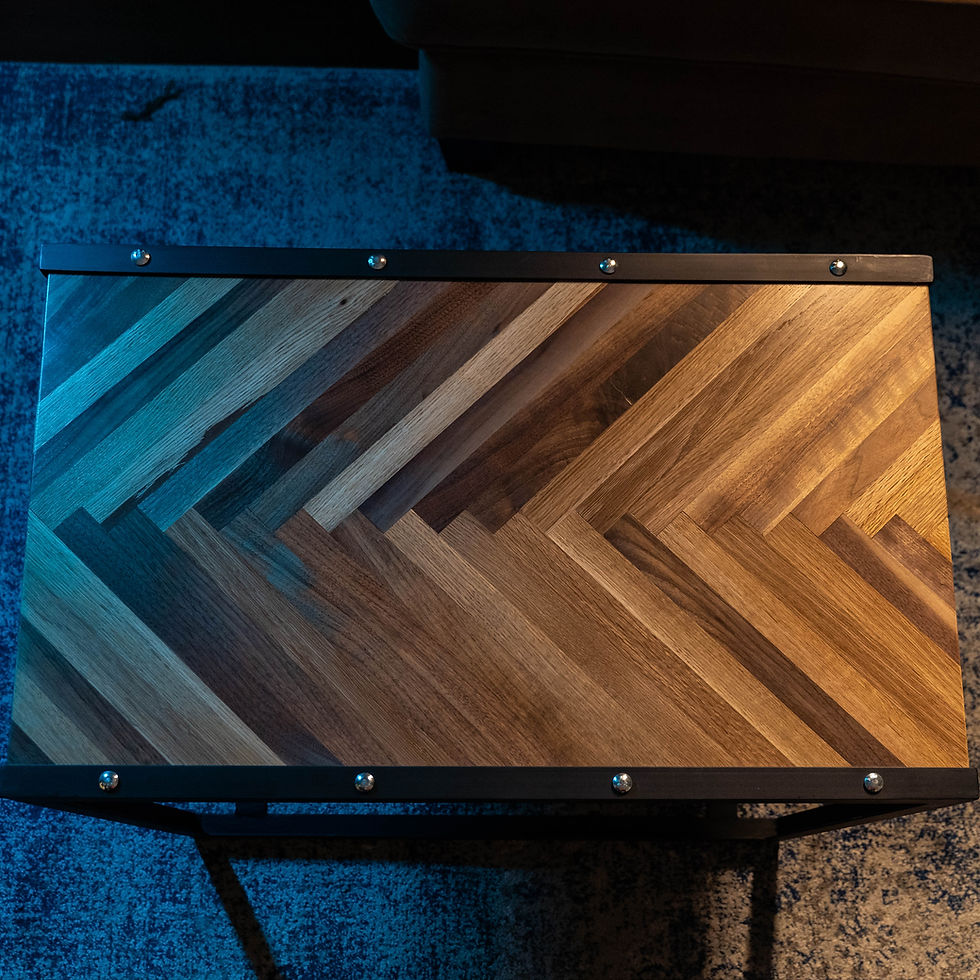
Since this post is coming out so close to Christmas I thought it was only appropriate that I decorate the photo shoot with some Christmas lights. From me to you, happy holidays, no matter what it is you're celebrating around this time of year.

Alright, alright. Enough of the fancy controlled photos. Time for some grimey progress photos taken in my workshop under the harsh fluorescent lights.
This wheelbarrow full of wood scraps is where I started this project. A friend of mine works for a company that does much larger wood projects. He messaged me one day to say that they were throwing out a bunch of offcuts and I was welcome to come and pick through them. Needless to say, I wasn't too discriminating, I backed up my truck to their loading dock and started tossing in every scrap of wood I could get my grubby hands on.
I am definitely not too proud to dumpster dive. Getting all the wood for free really brought down the cost of this project. I spent just a hair under $100 dollars to get it all done.

The first step was to mill all of the wood down to a uniform size and cut off any defective bits (like knots and cracks). Remember this was all scrap wood, so it wasn't in the best of shape. With most pieces, I had to cut 2 sides of the wood before I was left with anything usable.
All of the pieces I used for this project were cut to 1" x 3/4. Again because they were all scraps they all had different lengths. The pieces I ended up using for this project were between 20-30" long, but I've still got tons of shorter pieces left for another project.

To form my tabletop I had to glue all those pieces freshly cut pieces of wood together. The trouble is to properly glue wood together you have to clamp it together while the glue dries and the herringbone pattern is really annoying to clamp together due to all the angles involved.
To make my clamping a little easier I screwed the first two starter pieces to my work surface. That way when I go to clamp everything together I have a strong, immobile base, that I can clamp everything to.
When you're doing a herringbone pattern it's really important that each piece is exactly 90 degrees perpendicular to each other. I used a big framing square to make sure my starter pieces were a perfect right angle. Somehow I still managed to screw this up, and my starter pieces were slightly out of square. This caused me some headaches later on, but we'll get to that in due time.

Once I had my two starting pieces locked in position I started the gluing process. Each piece of wood got a generous bead of carpenters glue.
I made sure to apply glue to the side and the end grain of each piece. The butt joint where the end of one piece meets the side of the next piece is integral to holding everything together in a herringbone pattern. All of those butt joints running down the center of the table top are really the only thing that holds the two halves of this project together.
You might also notice that I've covered my table in a layer of plastic. I do that because once you clamp the wood together it squeezes out a lot of glue. Things can get sticky quick. If you aren't careful that glue will adhere whatever you're working on to the table. The carpenter's glue doesn't really stick to plastic so it makes it a lot easier to release once the glue dries.
Also, it keeps my table sparkling clean so I can eat my lunch off of them later.

Once I had 16-18 individual pieces laid out I clamped everything back to my two starters pieces. I tightened down the clamps until I saw some glue squeezing out from all of my joints and then gave the clamps another half turn and left it for an hour so that the glue could setup.
Originally I wanted to make the whole table top in one big glue up, but, during a test layout, I quickly realized that wouldn't work. Even in this photo, you can see that the clamps are pretty far from the center of the herringbone pattern. The more pieces I tried to clamp at once the further it pushed the clamps to the wings of the pattern.
Fun fact: This photo is actually a dramatic reenactment of my original glue up. I had an SD card fail on me after the first day of this project. So I had to go back and recreate a lot of the lost work. For what its worth it was a Samsung Evo 128gb Micro SD card. Completely corrupted everything on it and I only had it a little more than a year. Samsung then denied my warranty claim because I bought the card from Amazon, which isn't an approved retailer. Screw you Samsung. In case you can't tell I'm still a bit salty about the whole experience.

Glue, clamp, wait. Rinse and repeat 3 times.
I'm not going to lie, this part of the project was pretty boring. I spent most of my time sweeping up, organizing my incredibly messy shop and wasting time on my phone. As you can see from most of my photos though I probably should've spent more time cleaning and less time on Reddit.
Eventually, I had these 3 smaller intermediate pieces of herringbone pattern.

The last stage of this giant glue up was gluing those 3 intermediate pieces together. I applied glue to the joints between them and clamped everything with this elaborate web of clamps.
Just as I finished tightening the last clamp I heard a loud crack. Shit.
Remember how I said my starting pieces were slightly out of square? Well, the 3 intermediate pieces didn't fit perfectly together. When I clamped them together it applied quite a bit of force to the seam down the center. You can see, right at the bottom of this photo, the center seam ripped itself apart.
Thankfully this didn't affect the final build since that part pattern was always going to get cut off. I got really lucky here, if it had cracked at the other end I would've had to start all over again. Let that serve as a lesson to you kids at home, always double and triple check your angles haha.

After the glue was dry and all of the clamps were removed I was left with this giant chevron shaped piece of wood. Pretty cool, but I needed something a little bit more rectangular for this table.
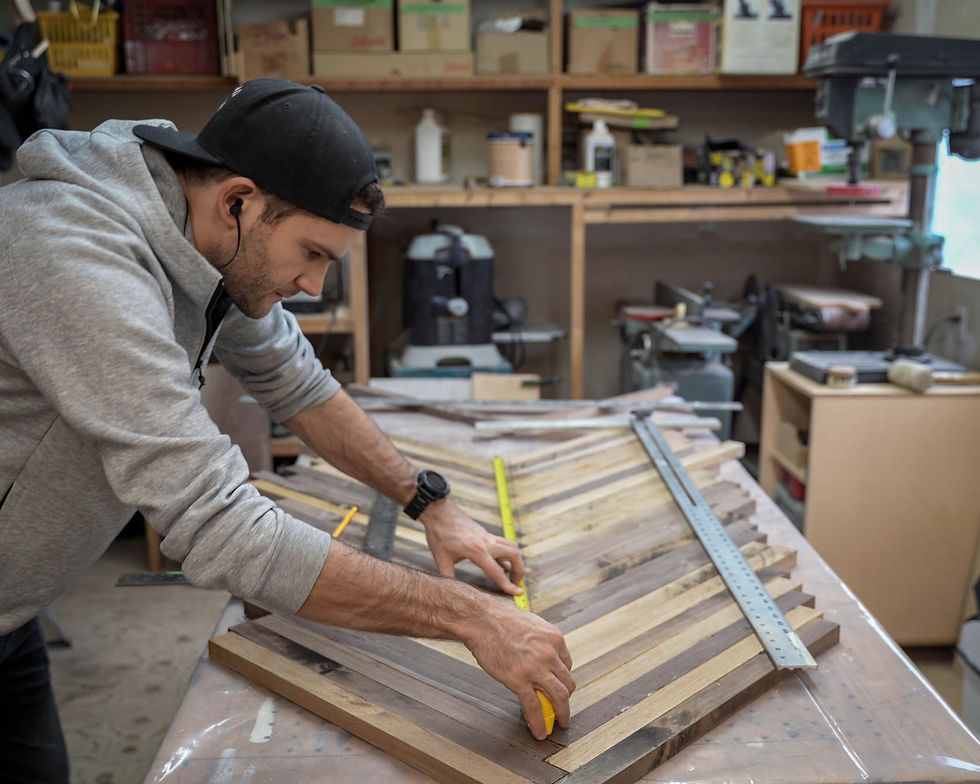
To accomplish this I started by finding a centerline through the pattern. That might sound easy, but the herringbone pattern can play tricks on your mind. Finding the centerline was a trial and error process for me. Pretty sure I got it, but I'm sure some people will let me know if I missed it in the comments. Once I had my centerline figured out I measured all of my other lines off it to keep things nice and symmetrical.
The rectangle I drew ended up being 22" wide and 36" long. I choose 22 inches because I felt that fit my living room/couch the best and I used the golden ratio to work out the length of the rectangle. You know about the golden ratio right? Just in case you missed that day in design class (not that I've ever taken a single design class) it's supposed to be the ratio between the width and length of a ratio that is the most visually appealing. In other words, it looks the most "rectangle-y".
That's a word, right? Rectangle-y. Ya, I'm pretty sure that's a word.
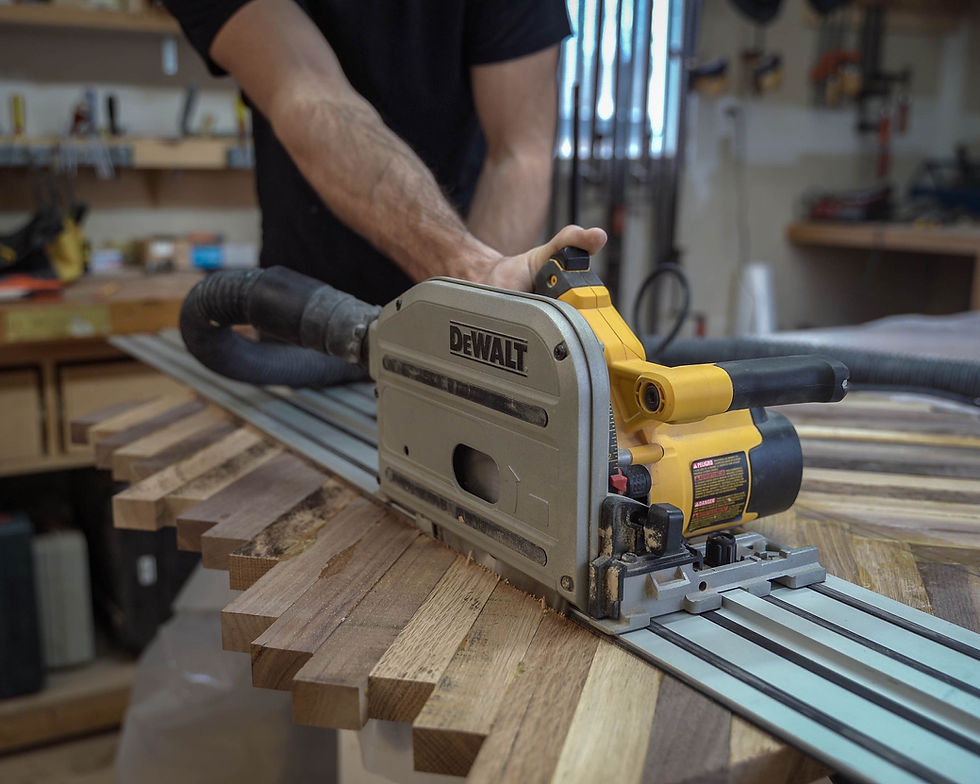
Using a track saw I cut along the lines I just traced onto the wood. Track saws are like circular saws that ride along a track so you get perfectly straight cuts every time. I use the track saw whenever I don't trust myself to freehand cut a straight line, so as you can imagine I get a LOT of use out of it. It's quickly becoming one of my favorite, and most used, tools for these furniture projects.
As you can see, the offcuts from this step were quite large, rather than throwing them in the garbage I saved them for another project I'm working on.
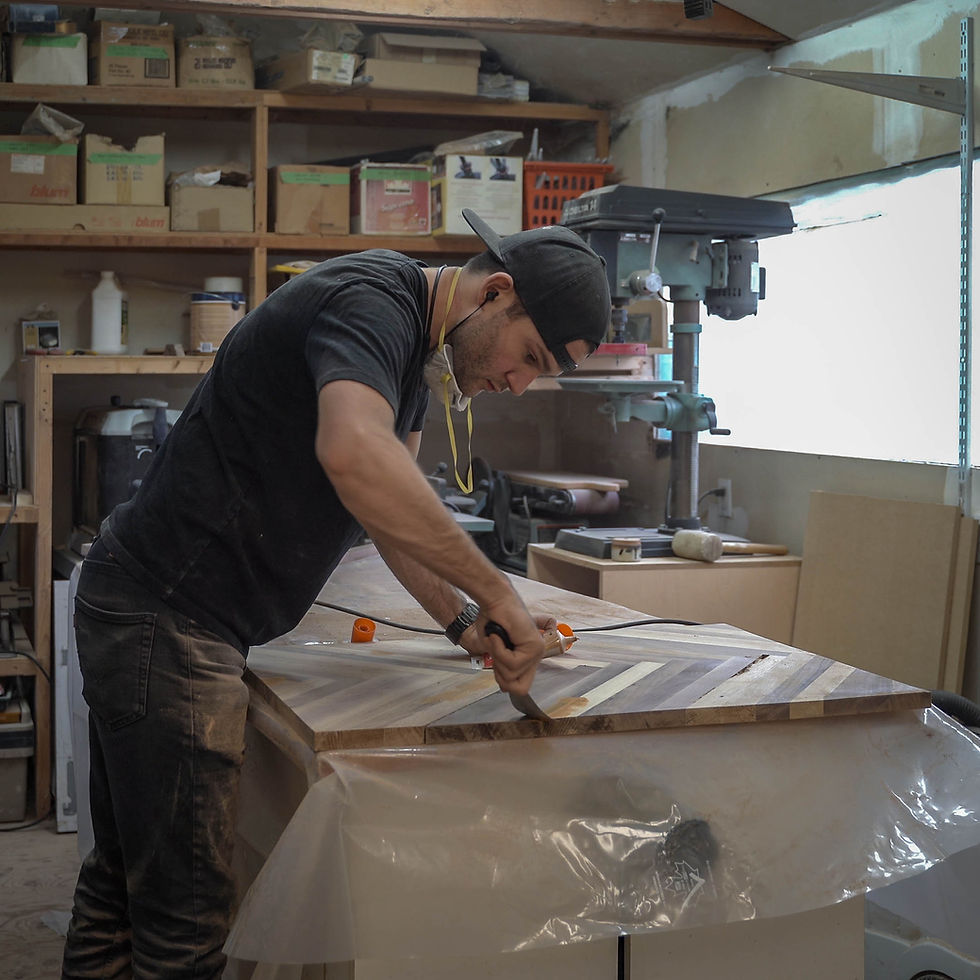
You might want to sit down for this. Believe it or not, my glue up wasn't 100% perfect. I know, you must be shocked. It was a lot for me at the time too.
There were still some small gaps and uneven joints in the table top. It's ok though, that's what we have wood filler for. Using a 2" putty knife I pressed some colour matched walnut and oak filler into any open crevice I could find.
I'd be lying if I said I got them all the gaps and crevices in the first pass. This step was repeated several times.
Turns out my track saw is good for cutting bevels as well as straight cuts!
While I was waiting for the wood filler to dry I grabbed the track saw again and cut some 10-degree bevels on the two ends of the tabletop. The bevels were necessary in order to make the tabletop fit into the legs I was about to make.
I wasn't originally planning to do this detail, but I realized my table top wouldn't fit tightly into the legs I had sketched out if I didn't. I'm glad it turned out to be necessary though, because the bevel became one of my favorite details in this build. It's funny how these things happen, and it's a good example of how my designs evolve during the course of a build. I rarely end up build exactly what I planned on building, there's always a few small changes along the way.

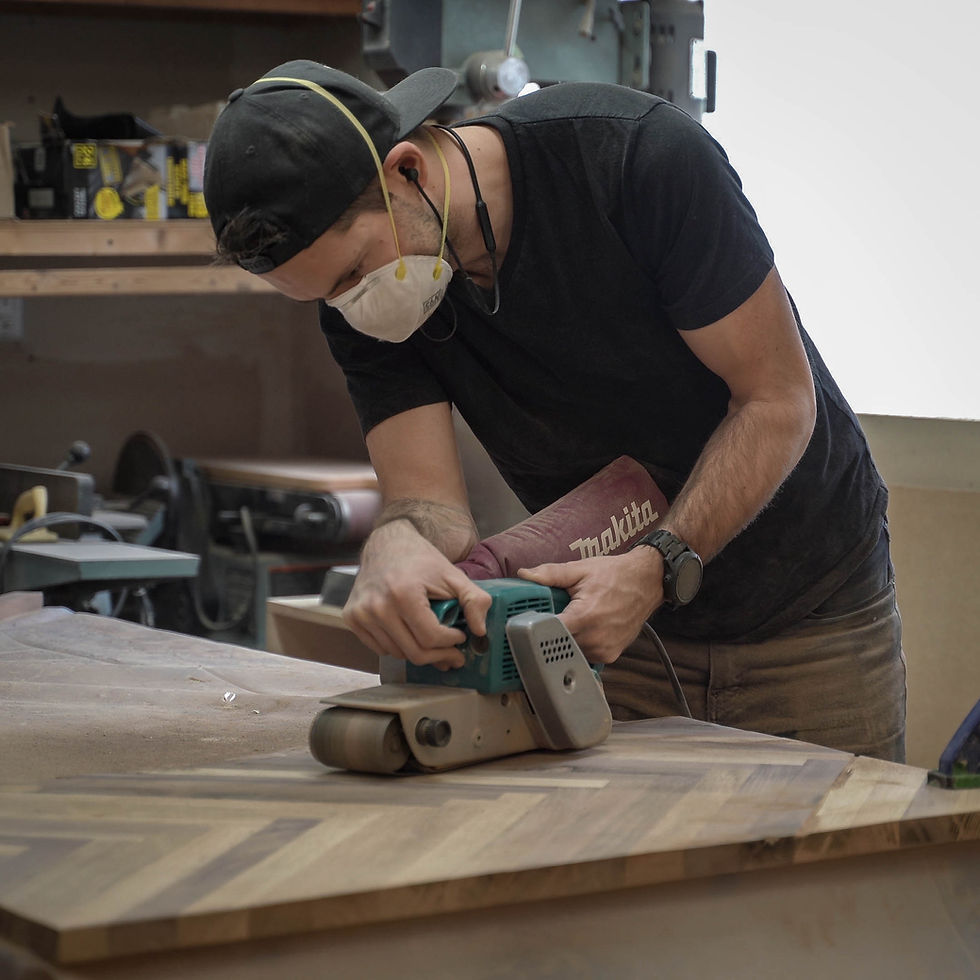
I really wish I had a giant planer. It would save me so much time. Alas, my planer is only 13" wide, and not nearly big enough for this table top. That left only one option for me, the belt sander.
I did my best to make sure every piece of wood was properly aligned before I clamped everything together in the glue up, but invariably, there's always some pieces that stick up a little higher and some pieces that sit a little lower. To remove that variation between pieces I sanded them off with an 80 grit sanding belt and a bit of patience.
Ok, more like a lot of patience. Oak is not the easiest wood to sand! This process took me at least a couple of hours.
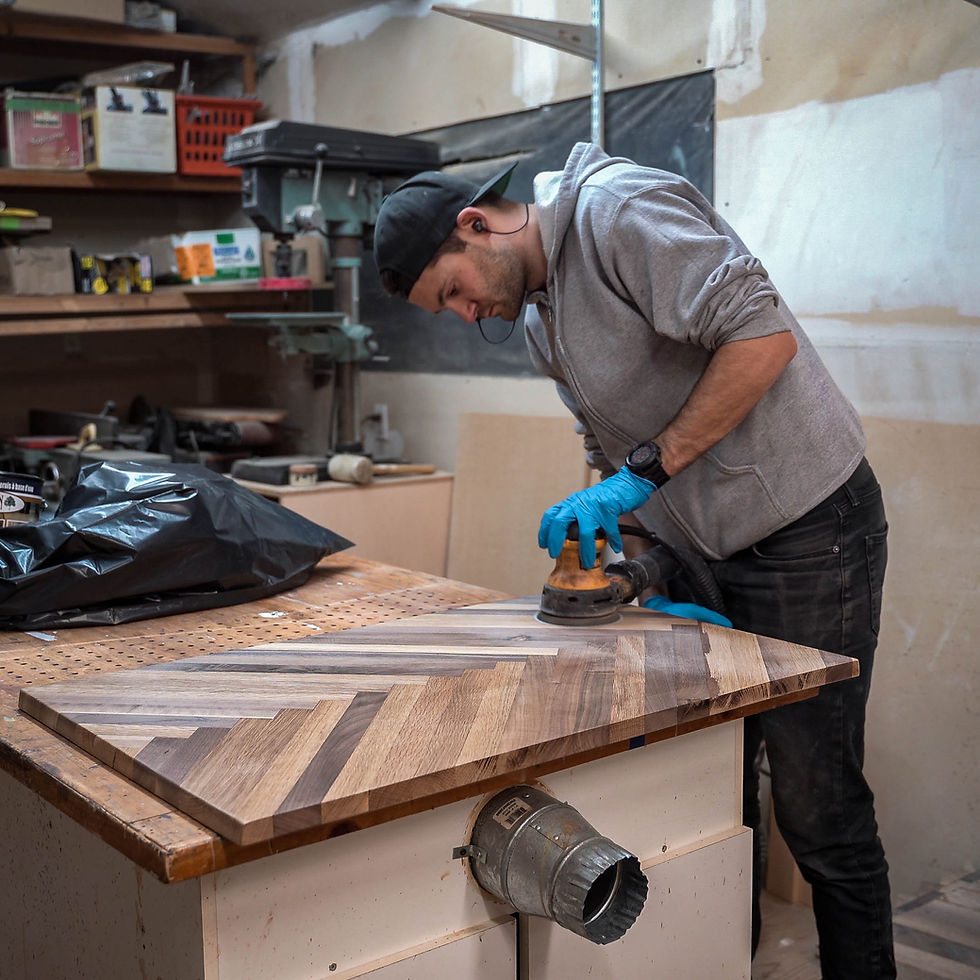
The belt sander is great for removing a lot of material quickly, but it leaves the wood with a pretty rough feeling finish. To give my table top that silky smooth finish I crave I needed my random orbital sander. I started with 80 grit sanding pads and slowly worked my way up to 220 grit. 220 grit leaves the wood with a really nice smooth feel to the hand, but there are still enough micro abrasions and surface imperfections that the varnish will adhere to it nicely.
Sanding is time-consuming, and frankly, not that interesting. But it's a job that needs to be done and since I work alone, that means I've got to do it. To help pass the time, I listen to a lot of audiobooks and podcasts while doing these projects.
While I worked on this table I listened to "Solaris" by Stanisław Lem. It's a polish (translated to English) science fiction book from the 60's about a human expedition that makes contact with a form of alien "life" that is almost completely beyond their understanding. I say "life" because I feel like the book is an exploration of what it is to be alive and conscious. The entity that the expedition meets really challenges our human conception of those two ideas. I won't spoil anything else but It was a really enjoyable read. Outside of a few outdated technological references, you'd never know it was published almost 60 years ago.

After sanding and before applying the varnish I gave the table top a wipe down with blue shop towels. The shop towels are really good at collecting dust and other dirt that gets stuck to the surface and doesn't leave behind any of its own fibers.
Trust me, you don't want any dust or dirt to get trapped beneath your clear coat. It'll drive you crazy. You'll just stare at it for hours and contemplate all the bad choices you've made in life... Or least I assume that's what someone in that situation would do. I wouldn't know...

If there's a better feeling out there than rolling clear coat onto raw wood, I sure as hell haven't found it. I love how the color and texture of the wood is instantly transformed. The tones and shades of the wood just immediately pop! I love it.
For this project, I used a satin floor varnish. Satin is a nice middle ground between a glossy finish and a matte finish. It hides flaws better than a glossy finish would, but it's also super easy to wipe stuff down and clean if it ever gets dirty. Which is important to me because I eat most of my meals at my coffee table and I'm a known spiller.
The particular varnish I used also dries really quickly so I'm able to do multiple coats relatively quickly.
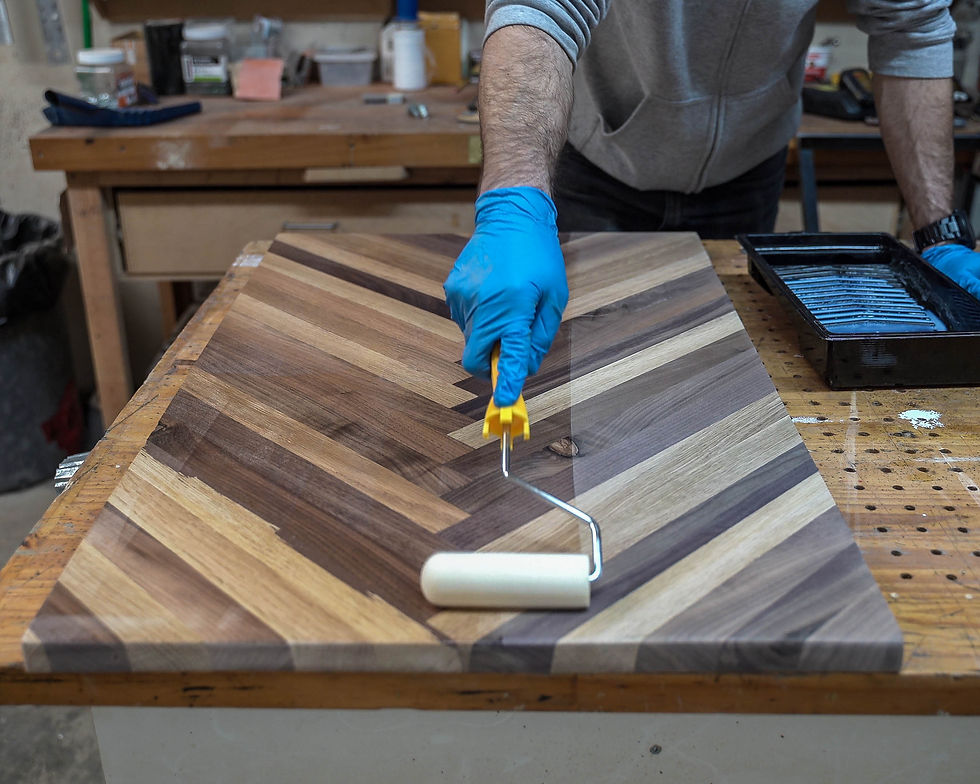
To save time, and avoid cleaning my tray and roller between coats, I stick them in a garbage bag, squeeze out most of the air and then seal the end. This helps to prevent the varnish from drying and clumping up in the tray.
If you just leave your tray and roller sitting out, uncovered, it'll probably be filled with half-dried snots and gunk when you go to use it 20 minutes later. Once the varnish starts to dry like this, it's basically unusable.

After applying the first coat of clear the grains of the wood have a tendency to swell and stick up ever so slightly. This will make the surface of the wood feel even rougher than before you applied the clear coat. Don't worry this is perfectly normal. It just means you have to sand before applying the next coat.
I gave the whole table top another good sand with 220 grit sanding pads.
In fact, many workers will "raise the grain" by applying water to the surface of their wood, letting it dry and sanding the wood again hours before applying any clear coat. That being said I usually skip this step. I seem to get good results by sanding extra diligently between the first and second coat. Your mileage may vary depending on the type of wood you're working with.
I ended up applying 4 layers of clear coat to my table top and I sanded between each coat to ensure a really nice smooth finish. Anything more than that though and you probably wouldn't be able to see the texture of the wood through the clear coat, and that would just be criminal.
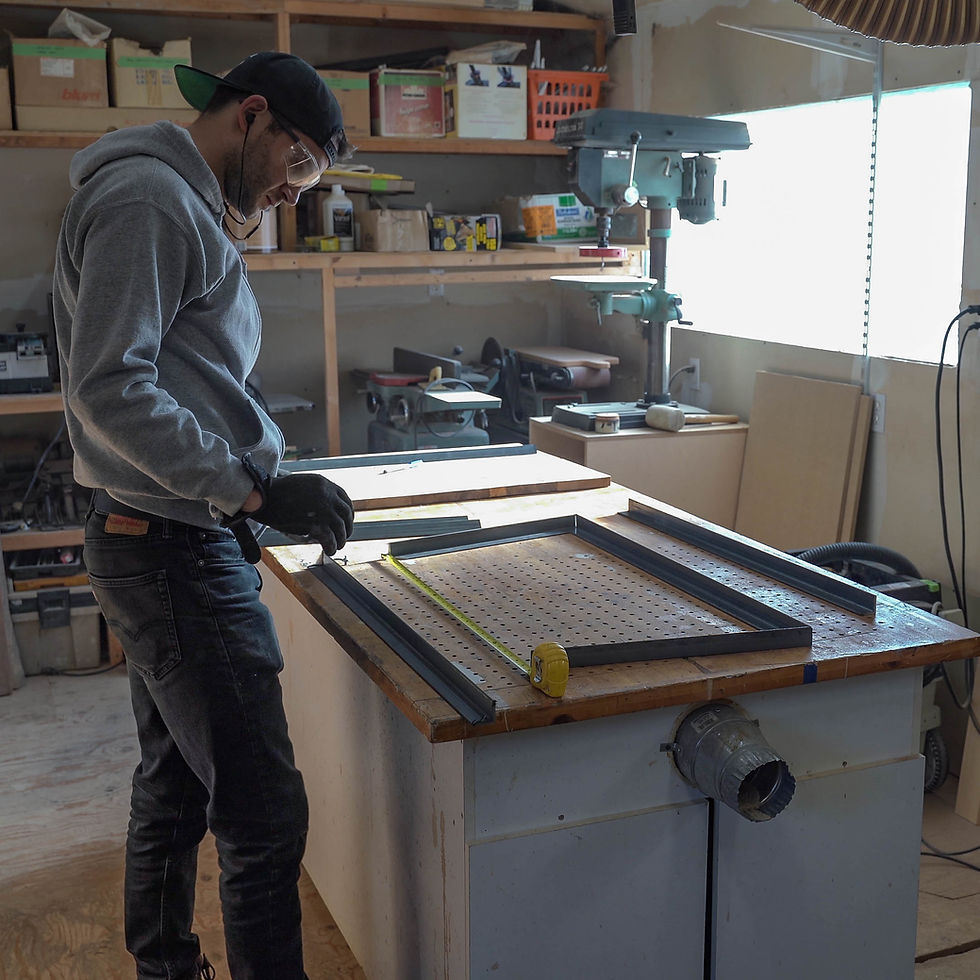
The other major component in this build was all of this steel angle iron. I've never really thought about it, but angle iron is a bit of a misnomer. Steel is largely composed of iron, but it's far from the only component. They should start calling this stuff angle steel. Anyways, it's 1/8 thick, 1 1/4" x 1 1/4" angle iron.
It's basically commodity-grade steel, I bought 40' feet of it for this project and another project and it cost me approx $75 CAD. I bought it from The Metal Supermarket, which I thought was only a thing here in Toronto, but as it turns out they have locations all across North America. If you need any metal for a project I highly recommend them, it's WAY cheaper than buying steel at Home Depot or Lowes.
They were also nice enough to cut all my pieces into roughly the right lengths, so if you don't have the tools necessary for cutting steel (and I know most people don't) it's a great option.

Once I finished the table top I was able to finalize the size of my legs. As I said, my angle irons were cut to ROUGHLY the right length but I still had to some measuring and cutting to do back in the shop.
My legs were going to be a trapezoid shape, and that meant I had some angles to figure out. I haven't had to figure out the angles of basic geometric shapes since 9th grade. Come to think of it, I'd like to take a second and apologize to my 9th-grade math teacher. When I told you I'd never need to know geometry in the real world I was wrong.
Sorry Mrs. Glenn. That being said, I still hold that calculus was a waste of my time haha.
My trapezoid legs had 4 inside corners. The two at the top were 100-degrees and the two at the bottom were 80-degrees.
To make a 100-degree inside corner I needed to cut a 50-degree miter onto my angle irons.
I set my handy digital angle gauge (seriously, everyone needs one of these, they are really cheap!) to 50 degrees and then traced a line onto the angle iron.

With an angle grinder and a cut off wheel, I freehand cut my miters. I was a little worried about this step, but it wasn't as bad as I thought it would be. Still I would've preferred to make these cut with a metal miter saw, but I don't own one of those.
I took it slow and traced the line I marked with a shallow cut. Once I was satisfied that my shallow cut was straight and followed the traced line I applied more pressure and cut right through the angle iron.
As long as you take it slow, it's actually pretty easy to control an angle grinder cutting through steel like this. Just make sure that when you start the cut you keep the blade straight, it's very easy for an angle grinder to bind up on a cut like this.
I then repeated both of these steps for my 80-degree corners by marking 40-degree miters and cutting them.

Wood that's been properly glued together is normally incredibly strong. Like, stronger than the natural forces that bind the fibers of wood together. My herringbone pattern though has a weak joint that runs right down the middle of the table top due to the limited surface area binding the two sides together.
It might've been fine, but I'd really hate myself if the table I spent days building split right down the middle as soon as I got it home.
To quell the worried voices in my head I decided to reinforce the underside of the table with 3 pieces of angle iron that I cut while cutting my legs. I attached them to the tabletop with some #10 3/4" pan head screws. These angle irons effectively stitched the two sides together and gave me a lot of peace of mind. As an added bonus they should also keep the tabletop from warping over time too.

This is what my miters looked like after I was done the cutting. They aren't perfect, but they're not bad for freehand cuts.
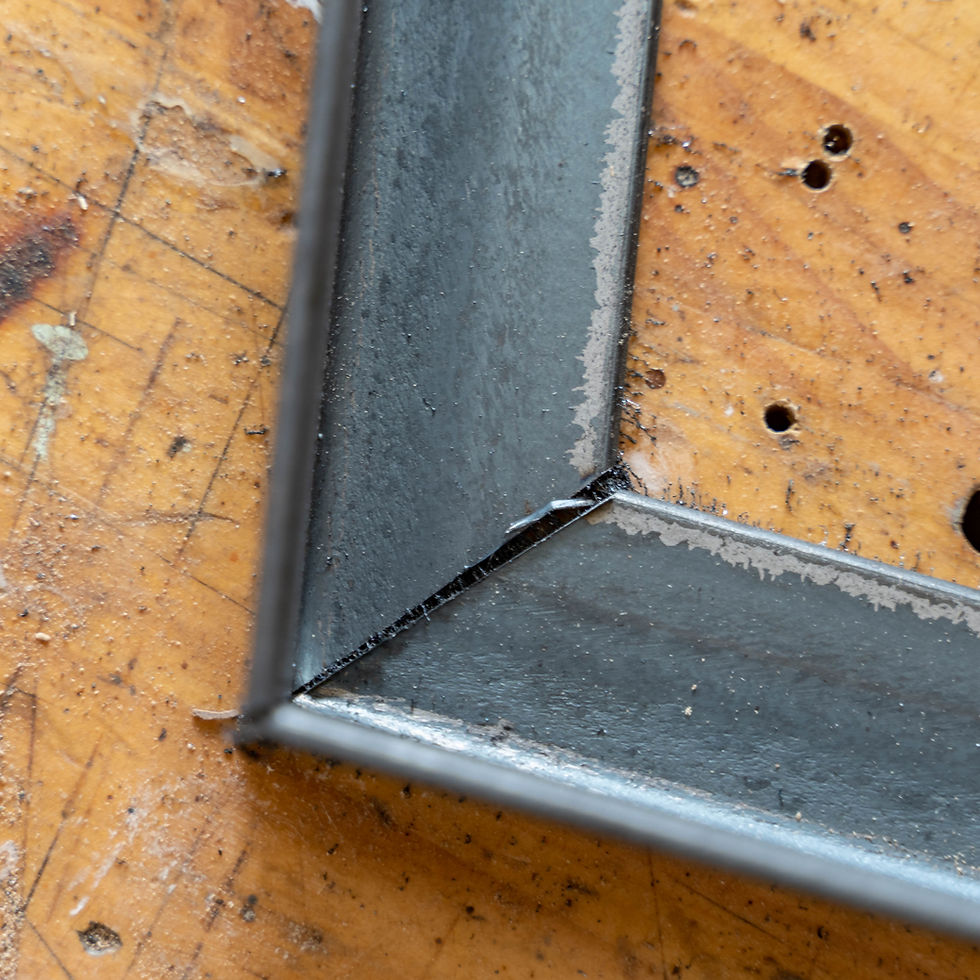
With all my miters cut and cleaned up, I was ready to try some welding. I say TRY, because this was my first time welding anything. I was pretty intimidated by the process, but I pushed forward. I practiced on a few scrap pieces until I felt comfortable proceeding onto the legs.
I clamped my angle irons to the table so the miter I wanted to weld was overhanging the edge of the table. I also made sure that when I clamped the two pieces of steel in place they were at exactly the right angle. Once I started welding there wouldn't be much room for adjustment!
As scared as I was to start welding it's something I've really wanted to add to my skillset for a long time, so I'm glad I finally got around to doing it.
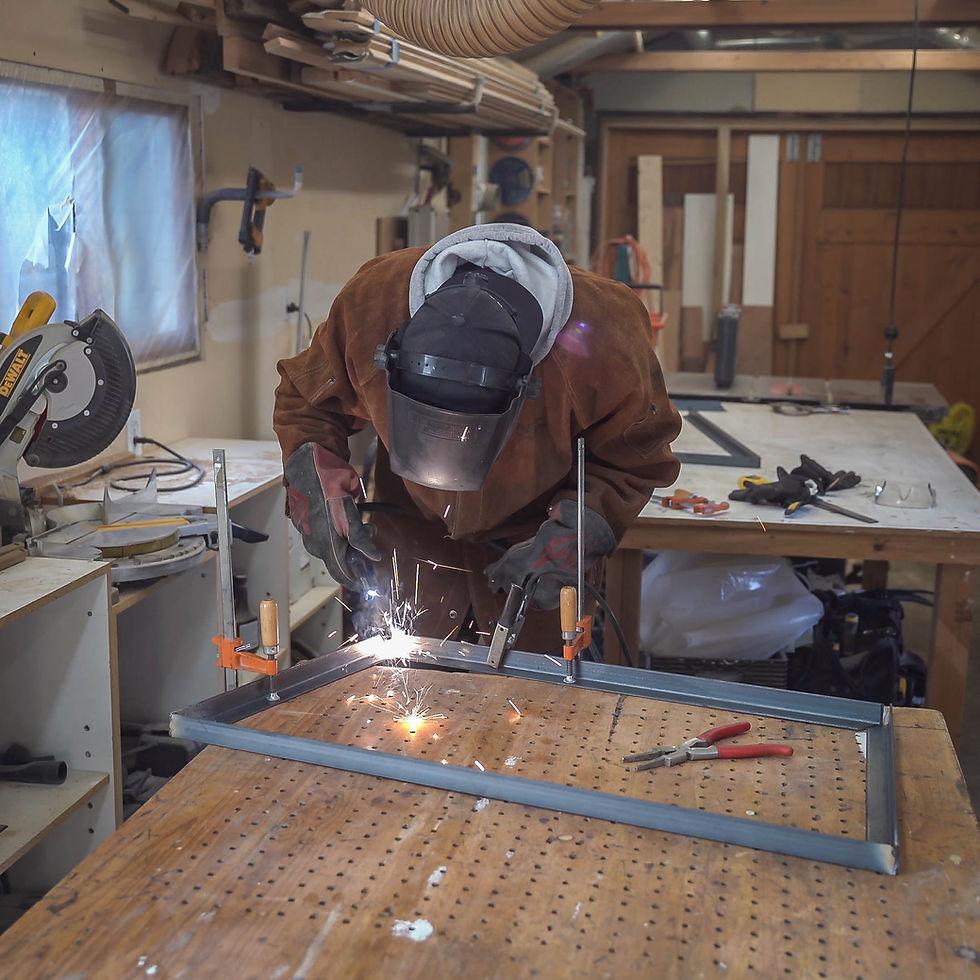
Hey looks, it's a really ugly weld! Oh well, what do you want for my first time haha?
Not the type of weld you'd want in a race car or something, but for a coffee table I think it ought to do.
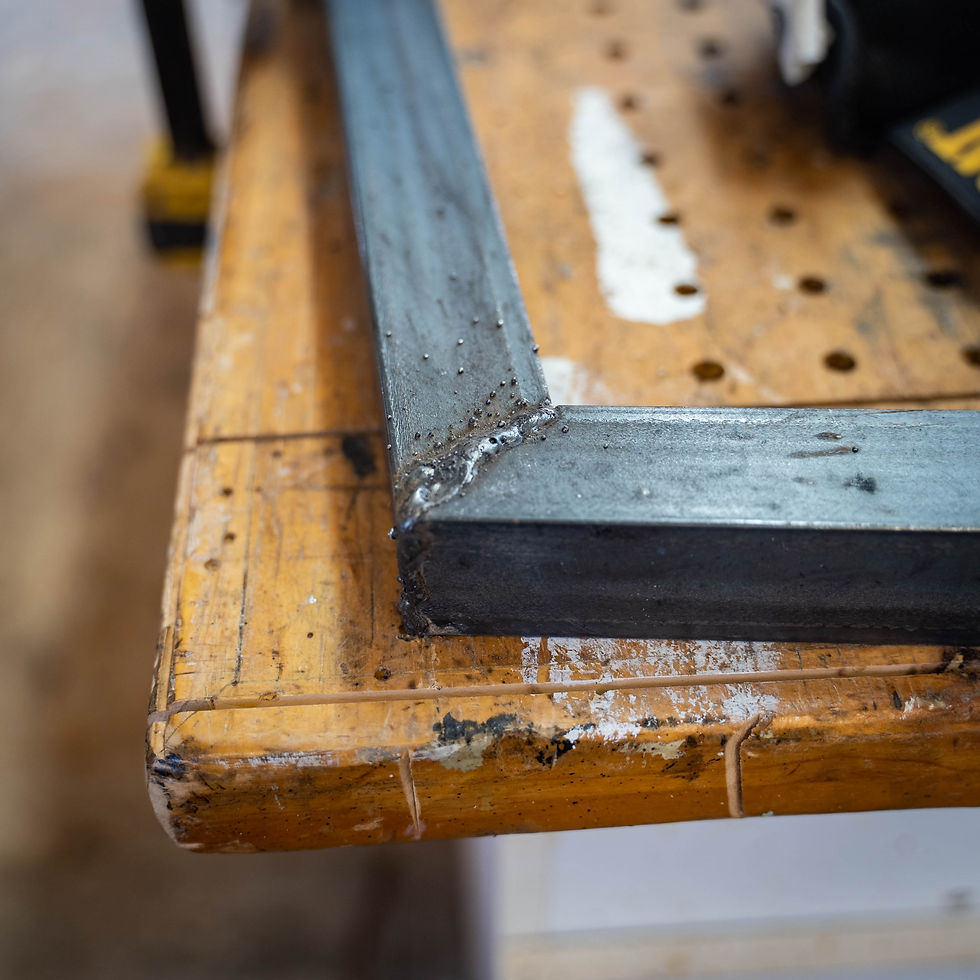
Using an angle grinder and a grinding disc I cleaned up my welds. Grinding discs are abrasive discs that you can use to slowly grind away at metal. Much like sanding, except for metal instead of wood. I worked each of my welds until they were decently flat.
I've found the best way to get good at doing something quickly is A) practice and B) be the guy whos responsible for correcting any mistakes. Grinding all these welds flush gave me a lot of time to reflect on how I could do my welds better next time :)
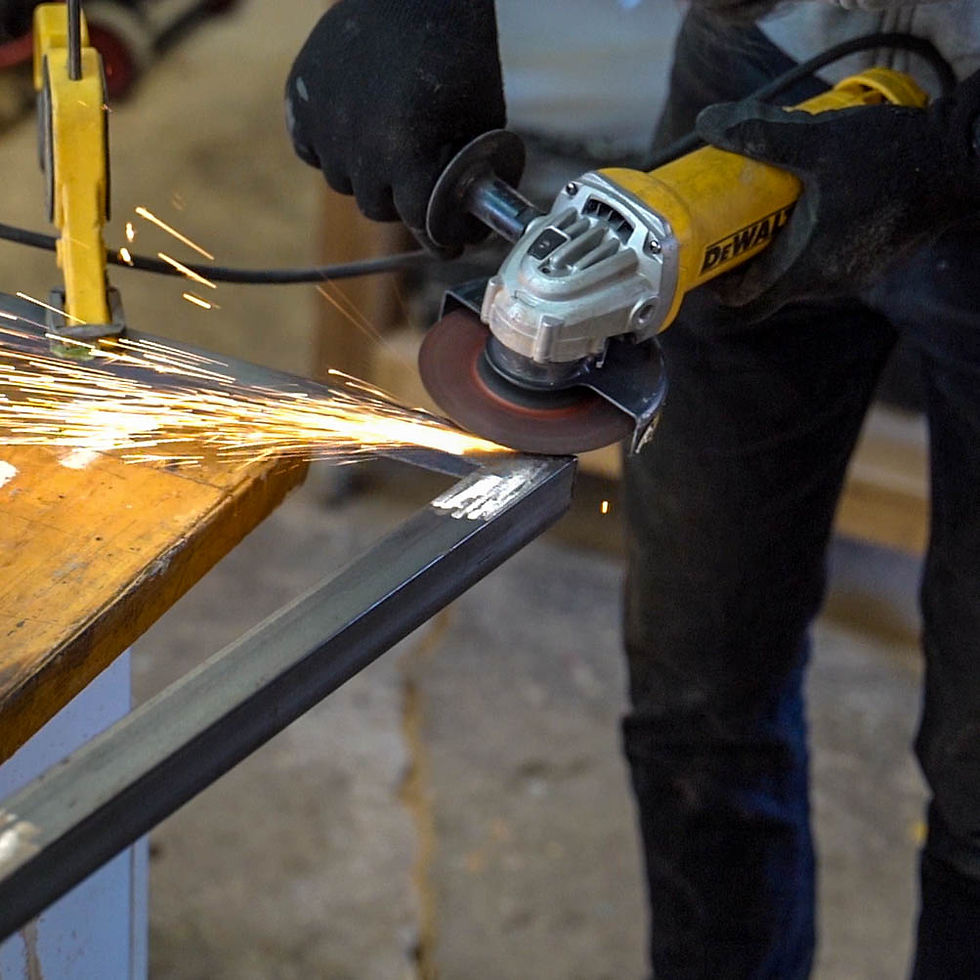
The angle grinder helped to smooth out my crappy welds, but to finish the job I used the random orbital sander with some 180 grit sandpaper.
After I was done sanding around my welds I did the rest of the legs for good measure. I also used the sander to round some of the hard edges every so slightly.

To secure my table top to the legs I decided to use the same mounting system my old coffee table had. Carriage bolts! Something feels so deliciously old-school about carriage bolts. It's probably just the word carriage in the name now that I think about it...
Anyways, that meant I had to drill 4 holes in each leg slightly larger than the 5/16th diameter carriage bolts I was using.
Drilling through metal is actually easier than you might think. All you really need is a halfway decent drill (I used a 12v DeWalt cordless drill, so nothing crazy powerful), some sharp drill bits and a lot of downward pressure. Use the slowest speed you drill has, and apply as much downward pressure as you think your drill bit can withstand. For bonus points you can use a little bit of cutting oil too, though it isn't strictly necessary, it will help keep your drill bits sharp.
I clamped the legs in a vice grip and drilled some small starter holes. I started with a 1/8th drill bit and worked my up to a 3/8th drill bit. The more drill bits you have between the first size and the final size, the easier the job will be.

Now my table top needed a set of corresponding holes drilled in it. Sure, I could've measured the holes on the legs and transcribed their locations onto the table top, but the tolerances here had to be really tight. I didn't trust myself not to screw this part up.
Instead, I clamped the legs to the table top and drilled through the holes in the legs and down into the tabletop, thereby ensuring perfect alignment!
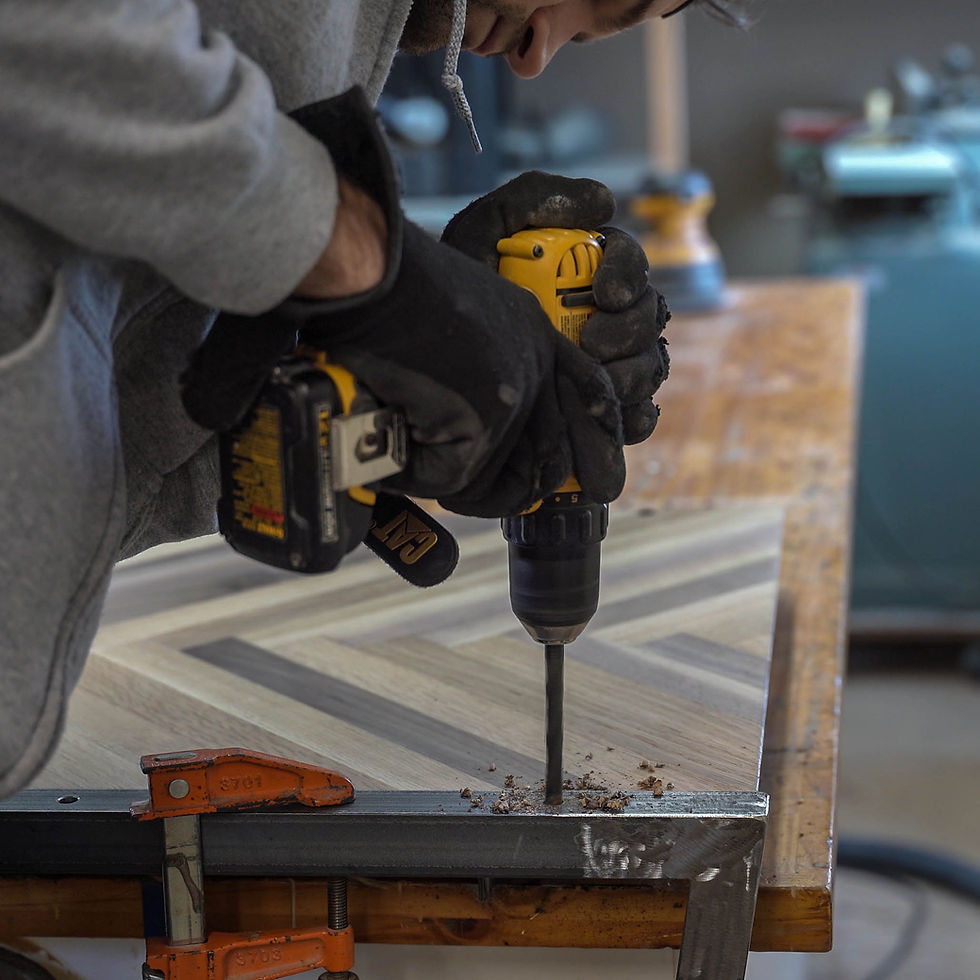
Moments before this photo was taken I thought I was basically done.
I had just done a test assembly of the table, bolting the legs to the table top, and was inspecting my own work. During this thorough inspection (which consisted of my pushing and shaking various parts of the coffee table) I found that the table had a little too much "wobble" for my taste.
With nothing linking the legs other than the tabletop, they had a tendency to wiggle around. To help correct for this I decided I'd install some flat stock steel between the two legs along the ground. By locking the two legs together at the top and bottom I was hoping to add some rigidity to the whole structure.
I measured the distance between the two legs at the top of the coffee table and cut the flat stock steel to the same length.

I set the legs up similar to how I had done the welding previously. With the joint I was actually working on hanging over the edge of the table and proceeded to log some more welding practice time.
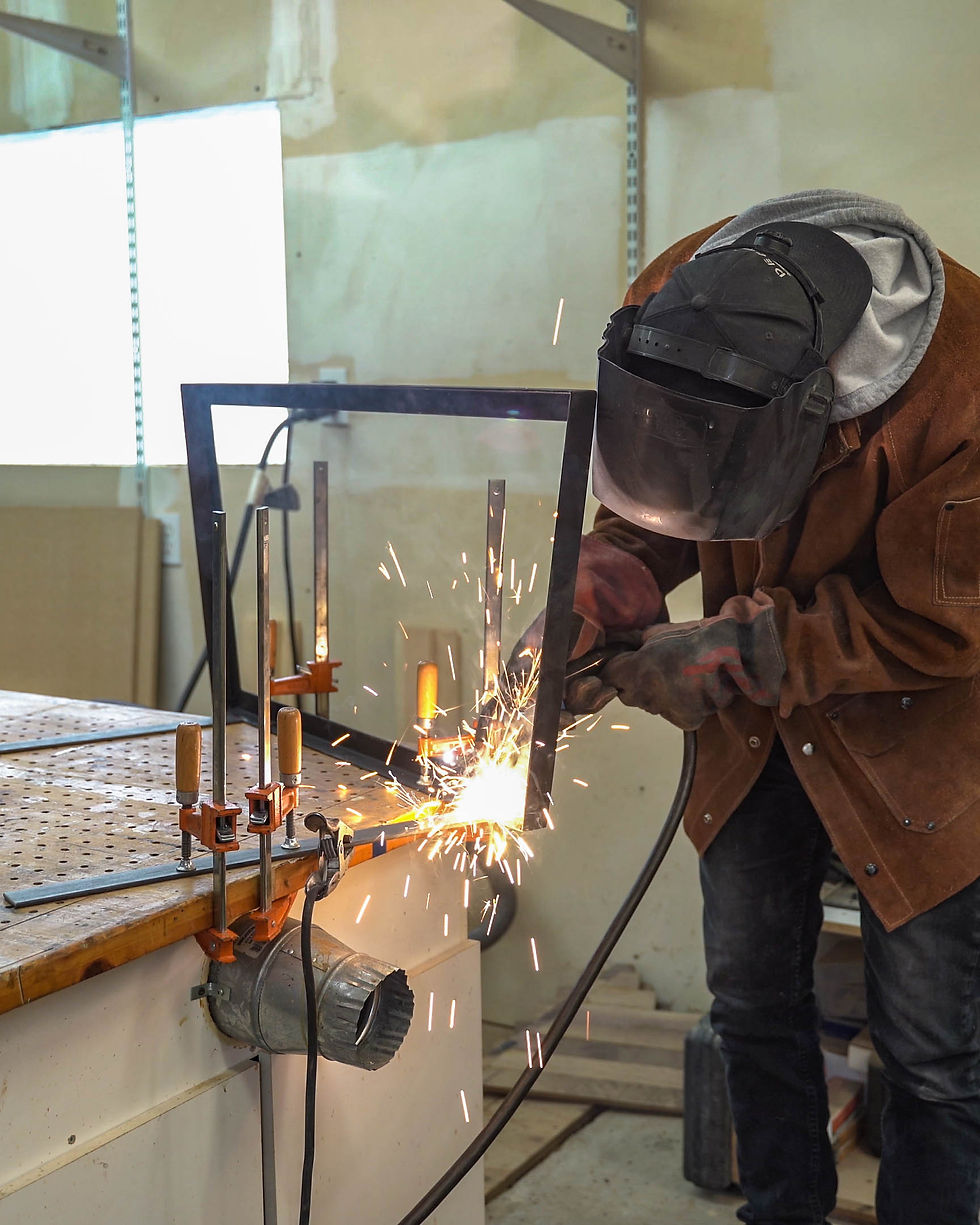
By this time, I was basically a welding pro and flew right through this part.
Oh, you didn't think I was being serious, did you? These welds were possibly worse than my first welds. Still, I struggled through the process and eventually got it done.
I welded the top side of the connection and then flipped the legs over and welded the bottom side as well. I don't know if this is proper procedure, I was basically just winging it.
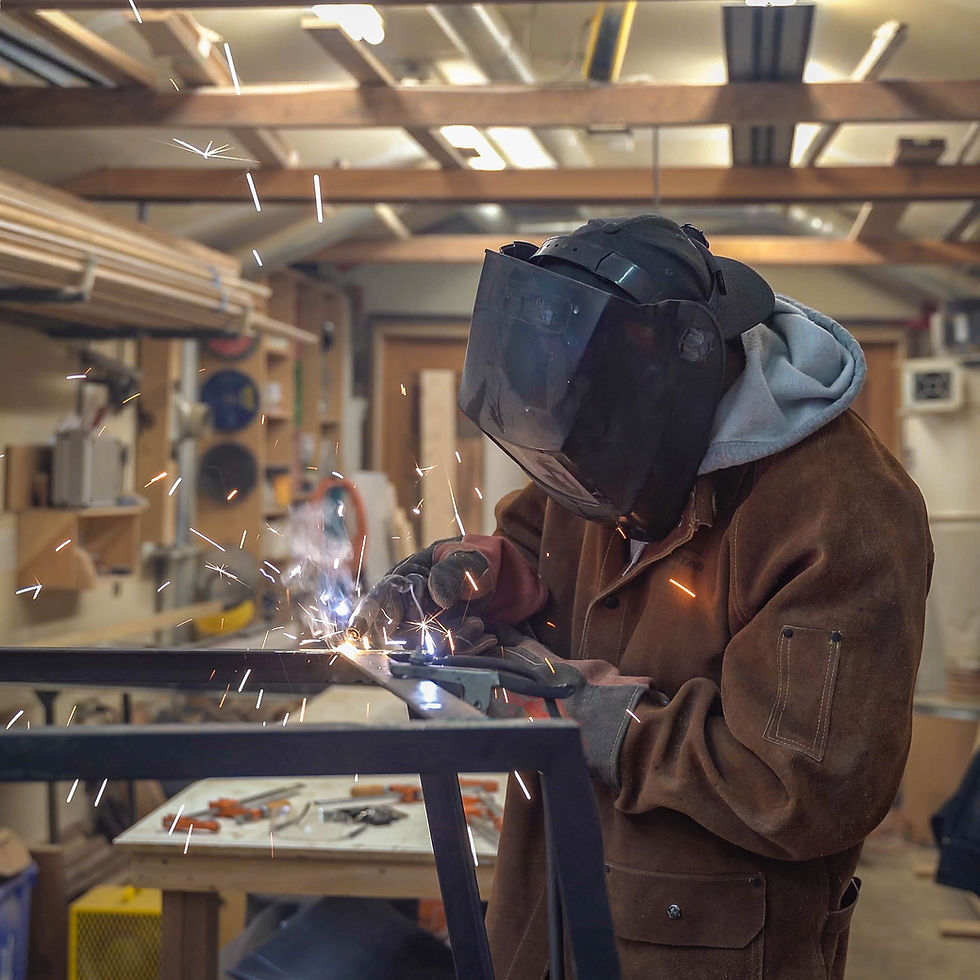
Annnnd again I had to spend some time grinding away at my ugly welds to make everything nice and clean looking.
Just more time to enjoy my audiobook though :)
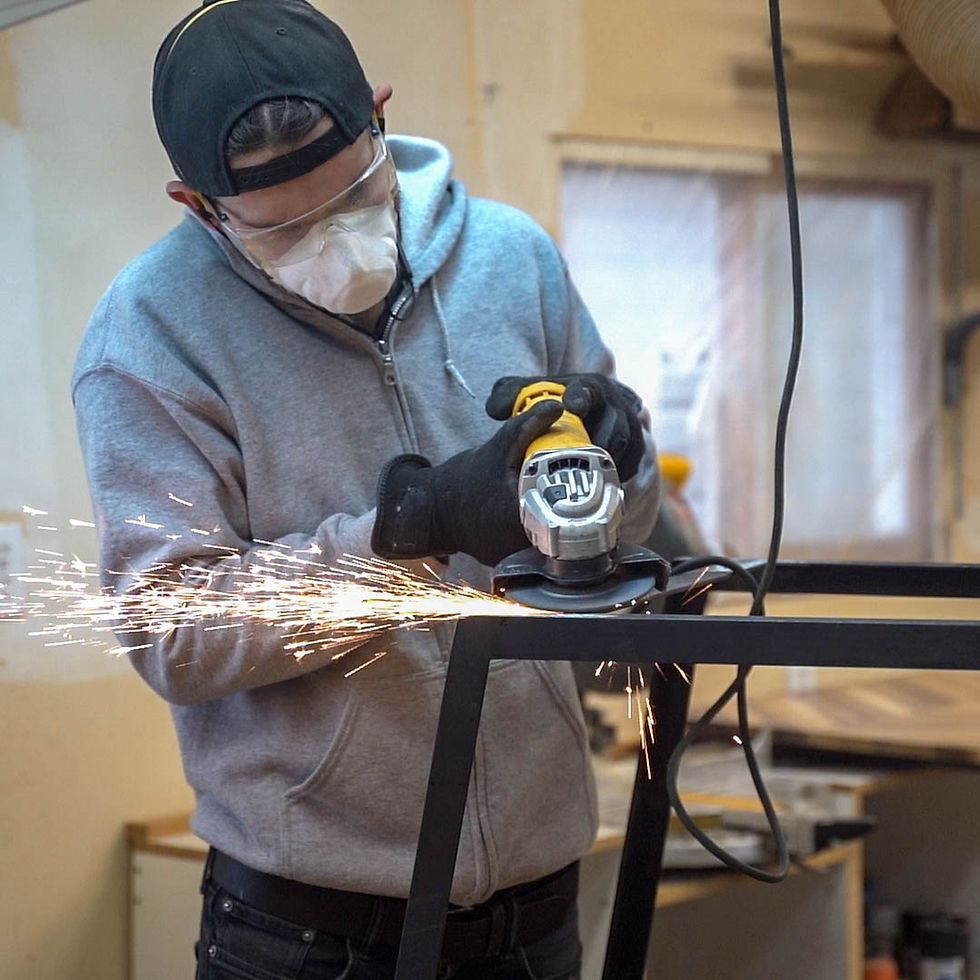
Time to strap on the old respirator and shake up that rattle can.
I sprayed on a quick coat of metal primer and then 2 coats of the finest flat black spray paint Lowes had available for $6. I picked black because it's a nice neutral colour, but my intention is to live with the table for a little bit and then re-think it's colour scheme in a few months.
Maybe I'll stick with black, maybe I'll do something crazy and paint it bronze.
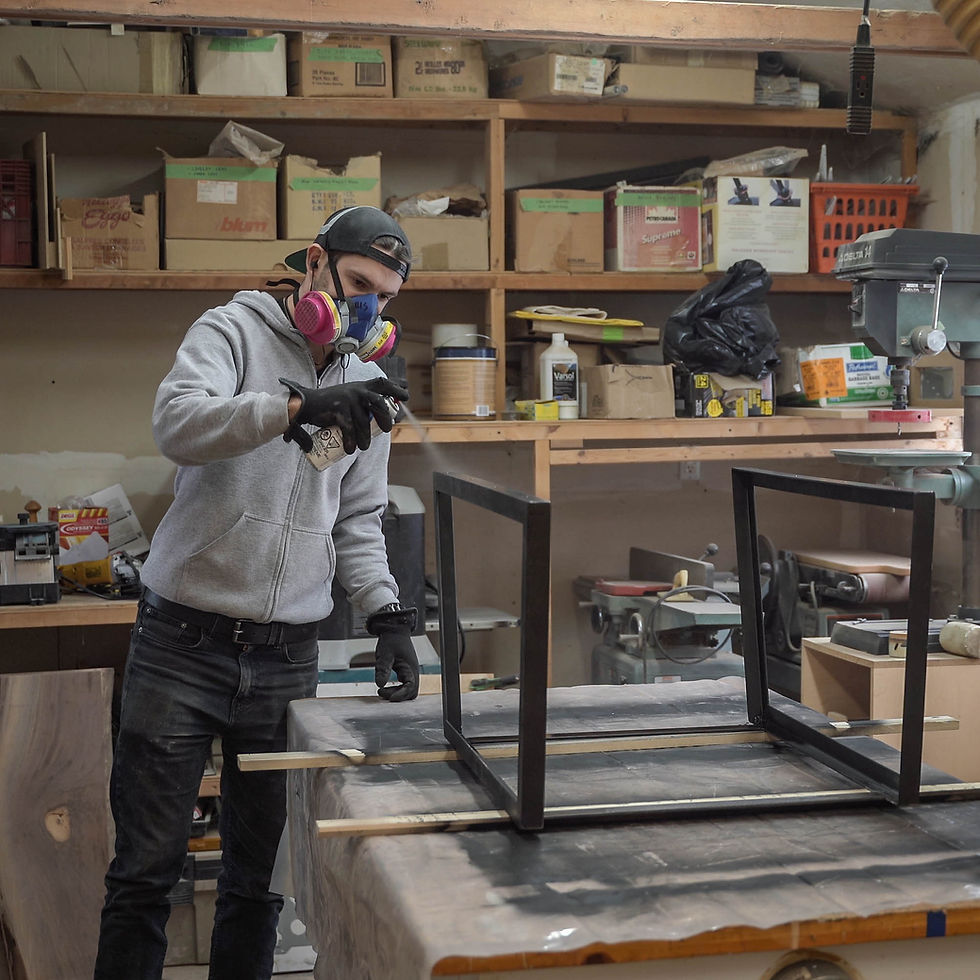
This is the face of pure determination. You can see that I'm ever so slightly biting my upper lip, something I do when I'm exerting maximum force haha.
With the legs painted and the clear coat dry, the only thing left to do was crank down the nuts on the carriage bolts with a socket wrench. And crank I did, as hard as I could. Well not really as hard as I could because I likely would've snapped a bolt, but pretty damn hard!
With the bolts sinched down, the only that was left to do was to load the table into my truck and take it home!

Welcome to my living room. Perhaps you've been here before in one of my other builds. Don't mind the Christmas tree to the right, that's just a temporary fixture for the holiday season.
This is the coffee tables new home. I think it'll be at home with all of my other furniture.
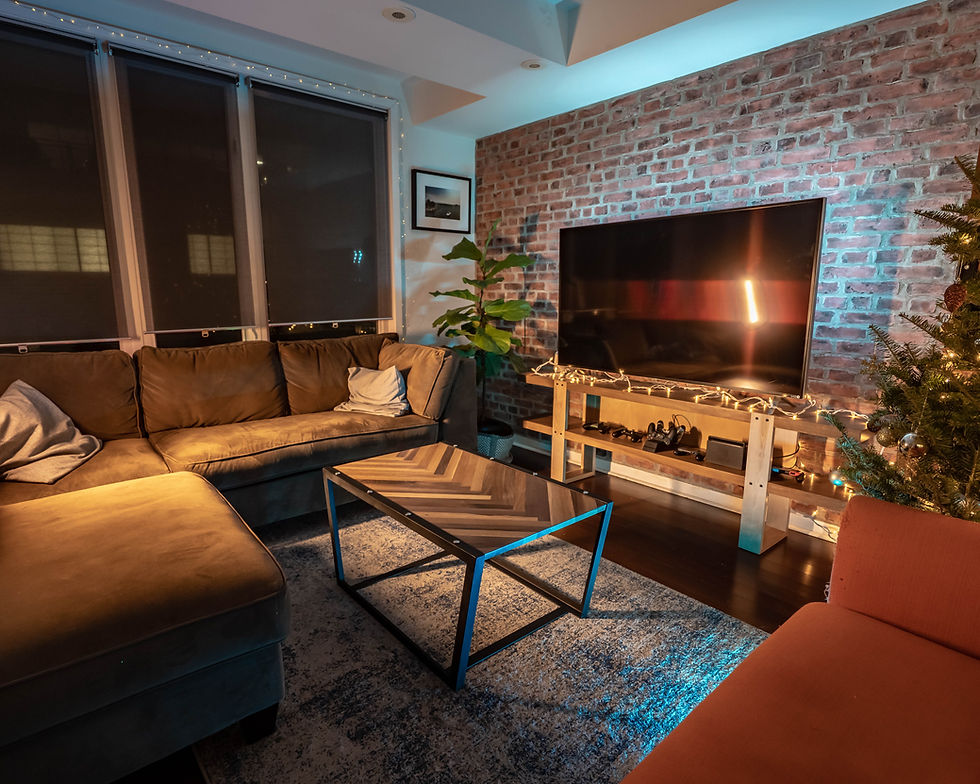
My welds on this project aren't perfect. Far from it. I never really wanted to have perfect seems though, I like the unpolished industrial aesthetic. There were a few times when I considered going back and filling these small imperfections but I couldn't bring myself to do it.

Remember how I said satin was a nice compromise between glossy finishes and matte finishes? Here you can see that it still looks quite smooth and glossy, it just has a little bit of that edge taken away. It's not a mirror finish, but its still pretty reflective.

Am I the only one that thinks nuts and bolts are way too expensive at the hardware store?
These carriage bolts, nuts, and washers cost me close to 10 dollars. Which feels like a lot for just 8 of each. I think they're much cheaper to buy in bulk, but that would require foresight and planning on my part so it isn't likely to happen.

The nice thing about making this project out of solid wood is that you can look at it from underneath and all of the patterns and grains are still there.
So much furniture these days is made from fake particle board with printed wood stickers wrapped around it. If you look closely it's always super obvious that it's fake. Grain patterns that don't line up or continue on the other side are always a give away for faux wood.
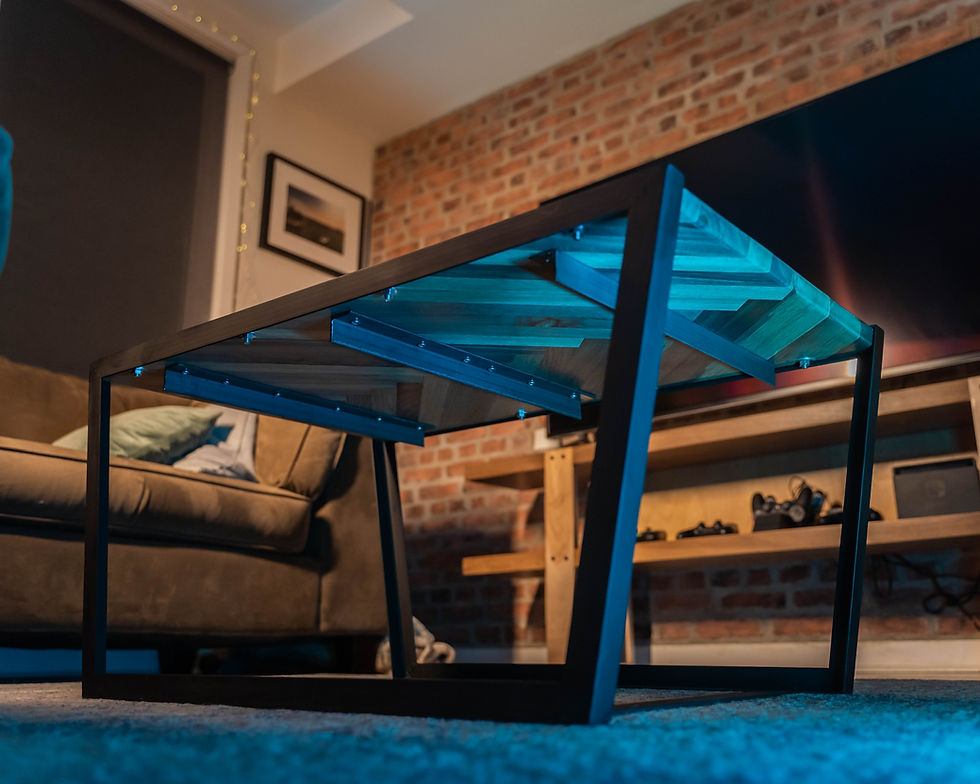
That's it for this build. This was a long post and if you stuck it out until the end, good for you. I hope you learned something along the way. I also hope that you like it more than Bing does, she seems more interested in the lights I used for the photos than the table itself.
Hit me with any questions or comments below. And again if you want to be one of the first people to see my next build follow me on Instagram. The link is in the first post. Cheers everyone, happy holidays!






Nice project!